Setup Non HA Kubernetes using K3S
Last Update: 25 February 2025
Resources
Section titled “Resources”- Quick Start K3S
- K3S: Setup dan Konfigurasi Kubernetes Cluster
- MetalLB: Installation with Helm
- Helm: Installing from APT - Ubuntu/Debian
Non-HA Control Plan Setup and Configuration
Section titled “Non-HA Control Plan Setup and Configuration”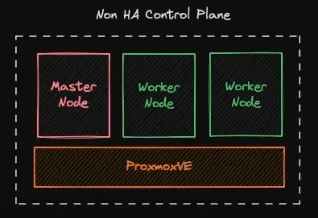
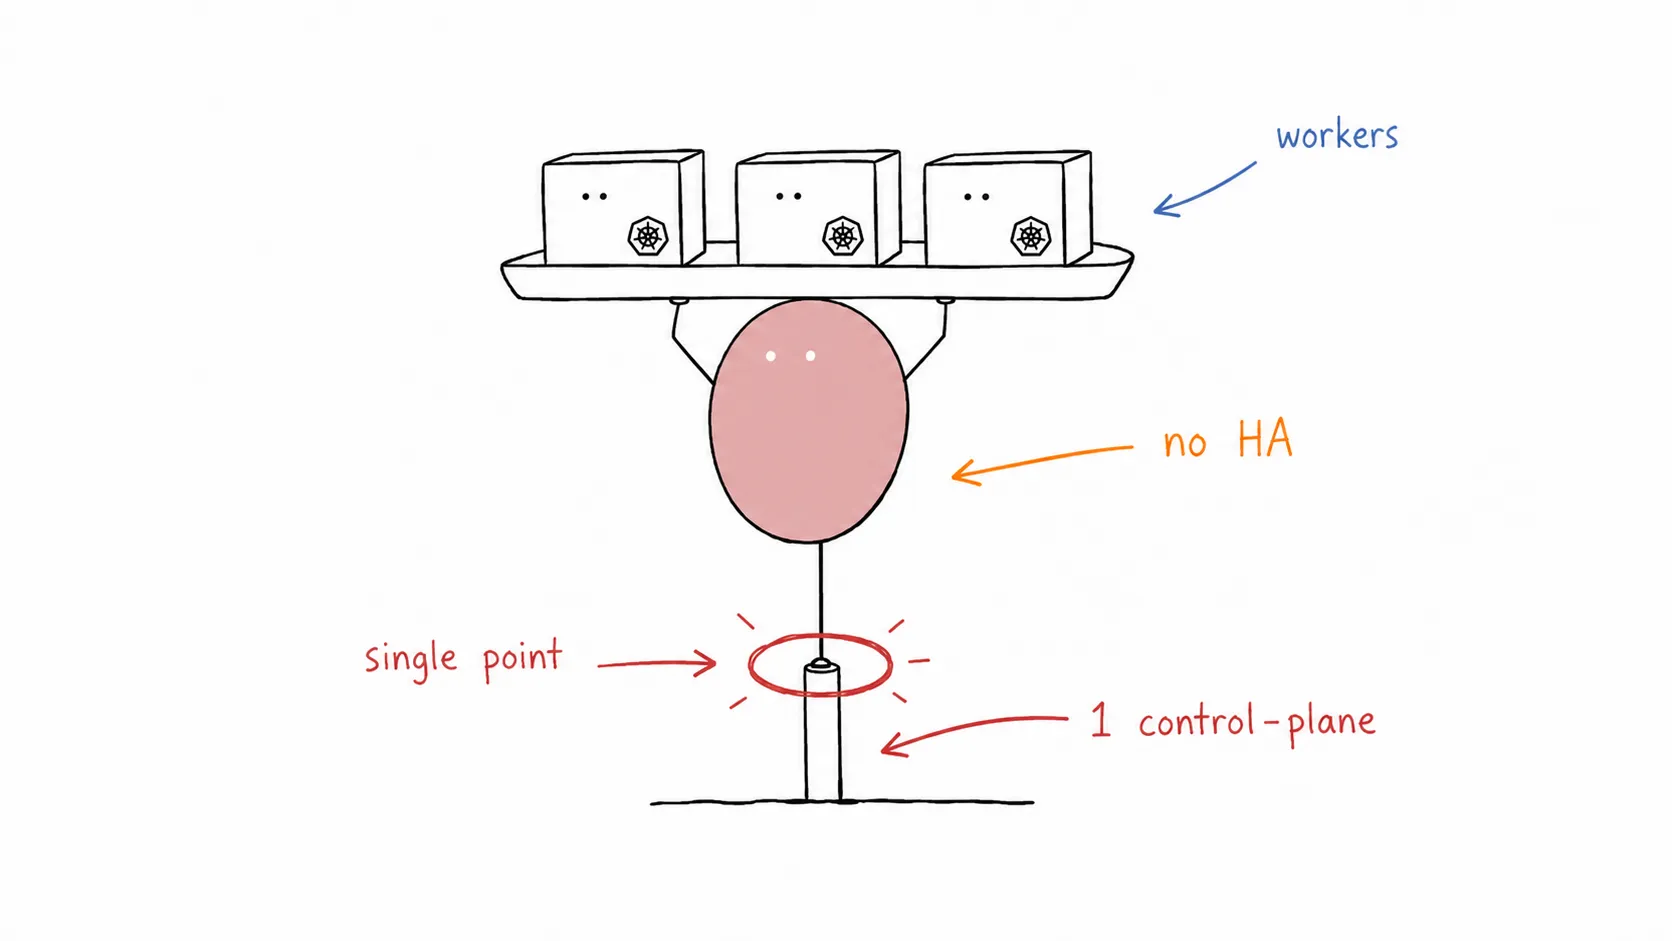
The implementation Scenario will be configured:
- 1 Master Node
- 2 Worker Node
These three nodes will be deployed in Proxmox VE, with each specification of node:
- 4 vCPU
- 16 GB of memory
- 50 GB of storage
- Ubuntu 20.04
Step by step
Section titled “Step by step”VM Setup
Section titled “VM Setup”-
Update and upgrade the package repository to the newest version.
Terminal window sudo apt update -ysudo apt upgrade -y -
(optional) rename and set /etc/host for each node became:
- Master node →
kube-master-1 - Worker node →
kube-worker-1,kube-worker-2
Terminal window #edit /etc/hosts and add this at the end of file (adjust ip address)10.0.2.200 kube-master-110.0.2.199 kube-worker-110.0.2.198 kube-worker-2 - Master node →
-
Reboot to finalize the upgrade and apply the hostname.
-
Install docker with this script (Docker: Install using the conveniencescript)
Terminal window curl -fsSL https://get.docker.com -o get-docker.shsudo sh get-docker.sh -
Check docker command and version
Terminal window docker psdocker version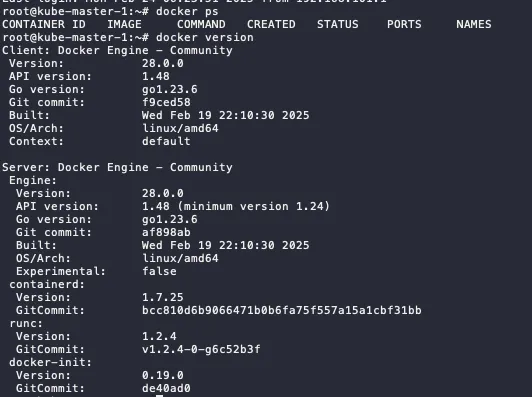
Master Node Setup
Section titled “Master Node Setup”-
Defined the K3s token. Save this token and make sure this token is the same for all nodes
Terminal window export K3S_TOKEN=kubernetesdemo123 -
The installation of master node, using this script:
- install the server as master node
- disable Traefik for ingress → will use Nginx ingress
- disable Servicelb → will use MetalLB
- disable local-storage → will use Ceph CSI
- declare to use docker
Terminal window curl -sfL https://get.k3s.io | sh -s - server --disable traefik --disable servicelb --disable local-storage --docker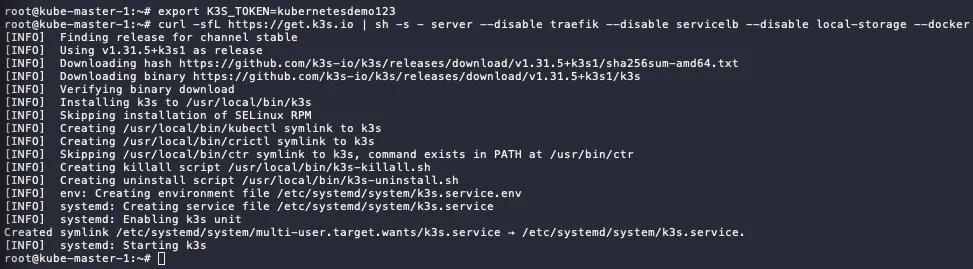
-
Check the service status, make sure it is active
Terminal window systemctl status k3s.service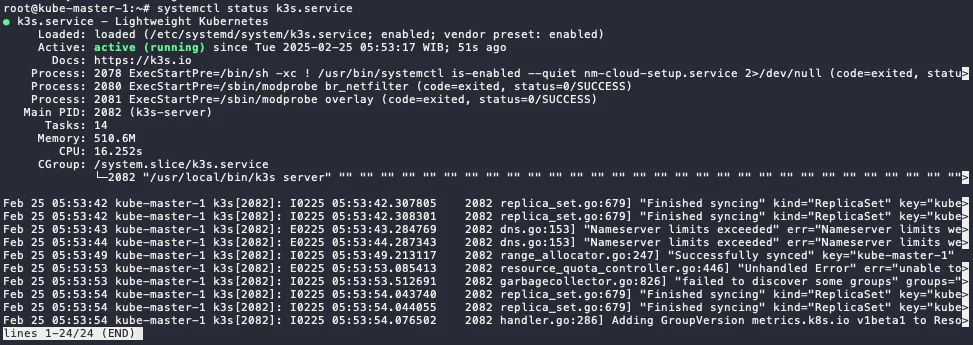
-
Check kubectl command. It will display 1 node only (which is the master node).
Terminal window kubectl get node
⚠️ if the get error
unable to read /etc/rancher/k3s/k3s.yml, you can fix with this step.Terminal window mkdir .kubesudo cp /etc/rancher/k3s/k3s.yaml .kube/config.yamlsudo chown $USER:$GROUP .kube/config.yamlexport KUBECONFIG=~/.kube/config.yamlor if you have not start the installation, you can add
--write-config 644in the end of the script, like this:Terminal window curl -sfL https://get.k3s.io | sh -s - server --disable traefik --disable servicelb --disable local-storage --docker --write-config 644
Worker Node Setup
Section titled “Worker Node Setup”Do this step for all the worker node, in this scenario will be kube-worker-1 and kube-worker-2.
-
Defined the K3s token. Use the same token as defined in master node.
Terminal window export K3S_TOKEN=kubernetesdemo123⚠️ If you forget the token on the master node, you can check and on the master node on this file. Copy all the string.
Terminal window cat /var/lib/rancher/k3s/server/node-token -
The installation of worker nodes, using this script:
- install the server as worker node (agent)
- declare to use docker
- define the server endpoint to master node ip or domain
Terminal window curl -sfL https://get.k3s.io | sh -s - agent --docker --server https://kube-master-1:6443 -
Check the service in the worker nodes
Terminal window systemctl status k3s-agent.service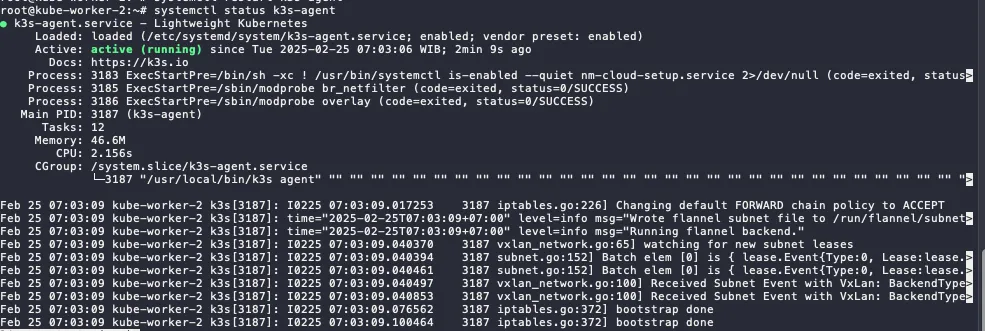
-
Check kubectl command in master node. Now, it will display more than 1 node (which is the includes all the installed worker nodes).
Terminal window kubectl get node
⚠️ If you stuck in when starting k3s-agent. Make sure worker node and master node can be connecting. it could be firewall, proxy server, or incorrect/mismatched MTU. Script below can be use for check the connectivity.
Terminal window
Install and Configure services in the Master Node
Section titled “Install and Configure services in the Master Node”Because we disable some service in the master node. Now we are going to install it the replacement services.
HELM - Package Manager Installation
Section titled “HELM - Package Manager Installation”-
Install Helm using script below (the latest script can be seen on the Helm docs):
Terminal window curl https://baltocdn.com/helm/signing.asc | gpg --dearmor | sudo tee /usr/share/keyrings/helm.gpg > /dev/nullsudo apt-get install apt-transport-https --yesecho "deb [arch=$(dpkg --print-architecture) signed-by=/usr/share/keyrings/helm.gpg] https://baltocdn.com/helm/stable/debian/ all main" | sudo tee /etc/apt/sources.list.d/helm-stable-debian.listsudo apt-get updatesudo apt-get install helm -
Check the version
Terminal window helm version
MetalLB - Load Balancer Installation and Configuration
Section titled “MetalLB - Load Balancer Installation and Configuration”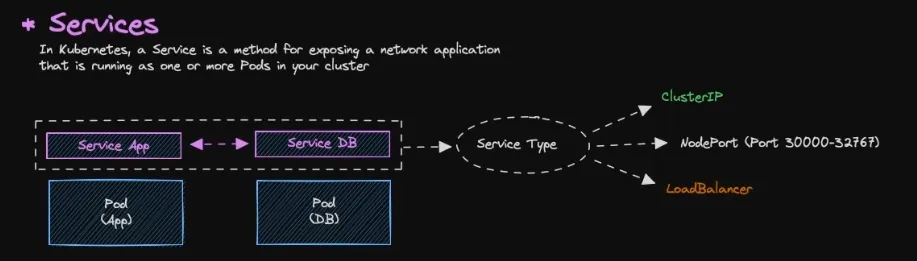
Services
Section titled “Services”- As default, all resources in Kubernetes are isolated, specifically pods.
- Pods are isolated by default. To enable communication between pods or with the external network, you need to configure Services.
- There are several type of service:
- ClusterIP → Default services, ClusterIP services provide an internal IP address within the cluster that other pods can use to communicate. They are not directly accessible from outside the cluster.
- NodePort (Port 30000-32767) → NodePort services expose a port on each node in the cluster, allowing external access. The port range 30000-32767 is the default range.
- LoadBalancer → LoadBalancer services provision an external load balancer that distributes traffic to multiple pods.
Installation Step by Step
Section titled “Installation Step by Step”-
Add metallb repository to helm
Terminal window helm repo add metallb https://metallb.github.io/metallb -
Check the repo list
Terminal window helm repo ls -
Search the metallb
Terminal window helm search repo metallb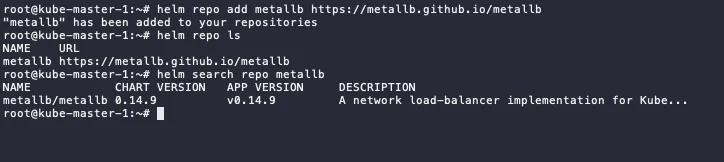
-
Pull the metallb from the repository, it will download tgz file.
Terminal window # run this in the home dir or other directoryhelm pull metallb/metallb# extract the tgztar xvf metallb-* -
Change directory to metallb and if there any configuration changes, you can edit values.yaml
Terminal window cd metallb#optionalvim values.yaml -
Install metallb using helm
- Set the chart name to metallb
- Define the file to values.yaml
- Put the namespace to metallb-system
- Enable debug mode
- Create metallb-system namespace
Terminal window helm install metallb -f values.yaml . -n metallb-system --debug --create-namespace -
Check the status, if the status still init, wait until running.
Terminal window kubectl -n metallb-system get allkubectl -n metallb-system get pod -w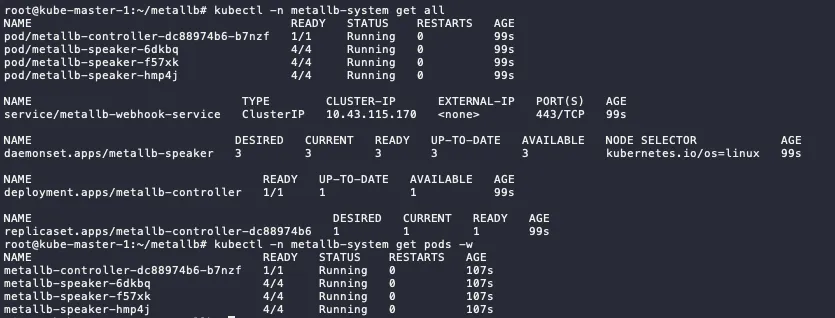
Configuration
Section titled “Configuration”-
First, define the address pool on
ipaddresspool.yamlapiVersion: metallb.io/v1beta1kind: IPAddressPoolmetadata:name: default-poolnamespace: metallb-systemspec:addresses:- 10.0.2.11-10.0.2.100 #adjust this range -
Apply the configuration
Terminal window kubectl apply -f ipaddresspool.yaml
-
Then, we define the L2 Advertisement config on
l2advertisement.yamlapiVersion: metallb.io/v1beta1kind: L2Advertisementmetadata:name: defaultnamespace: metallb-systemspec:ipAddressPools:- default-pool -
Apply the configuration
Terminal window kubectl apply -f l2advertisement.yaml
Test the Load Balancer
Section titled “Test the Load Balancer”-
Run demo app for the testing, the demo app using nginx image.
Terminal window kubectl run app-demo-1 --image=nginx --port=80#check the pod status, wait until runningkubectl get pod -
Since by default pod cannot communicate to outside, we need to create the service to expose the pods.
Terminal window kubectl expose pod app-demo-1 --type=LoadBalancer --target-port=80 --port=80 --name app-demo-1#check the pods and serviceskubectl get all
-
You can access the app using
EXTERNAL-IPofservice/app-demo-1and Nginx landing page will show up.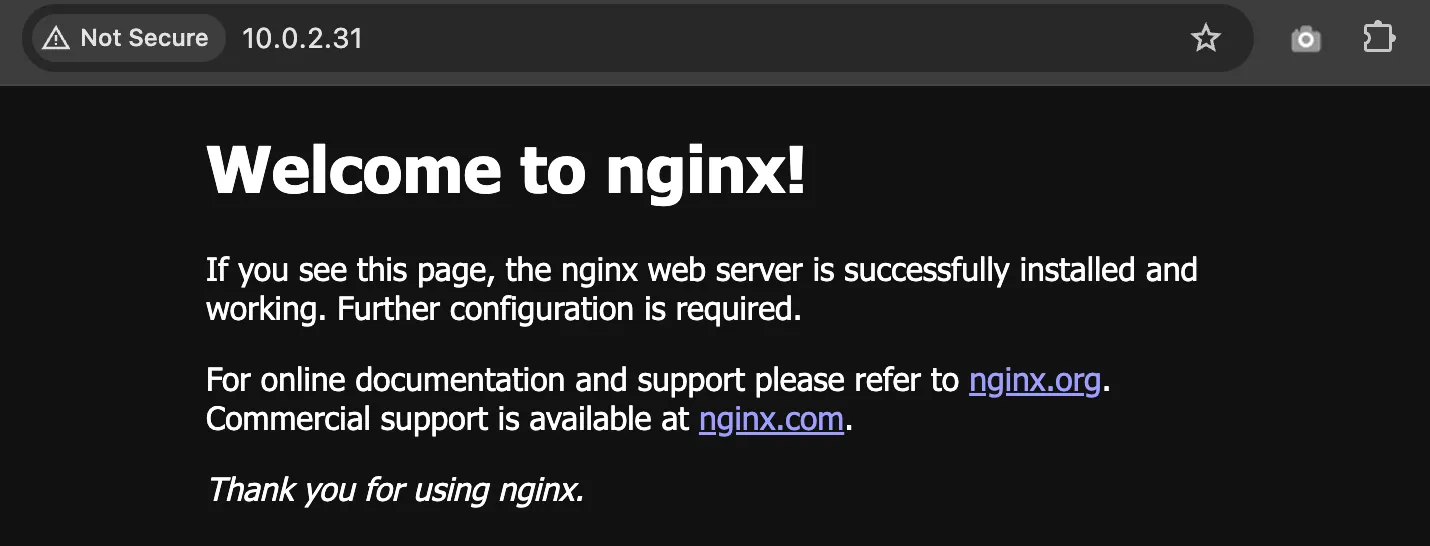
Nginx - Ingress Controller Installation and Configuration
Section titled “Nginx - Ingress Controller Installation and Configuration”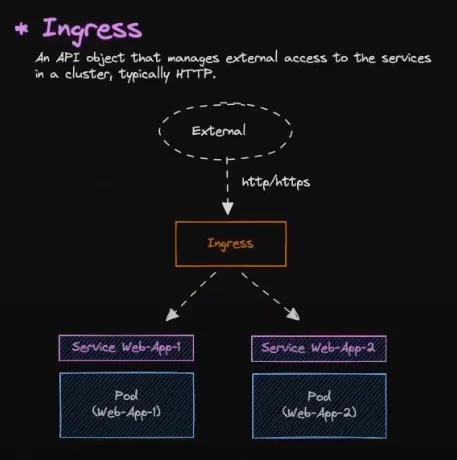
Installation Step by Step
Section titled “Installation Step by Step”-
Add nginx repository to helm
Terminal window helm repo add nginx-stable https://helm.nginx.com/stable -
Check the repo list
Terminal window helm repo ls -
Search the nginx
Terminal window helm search repo nginx -
Pull the nginx-ingress from the repository, it will download tgz file.
Terminal window # run this in the home dir or other directoryhelm pull nginx-stable/nginx-ingress# extract the tgztar xvf nginx-ingress-* -
Change directory to nginx-ingress and edit
values.yamlfile.Terminal window cd nginx-ingress# edit values.yamlvim values.yaml# locate ingressClass and change the variable below to true...ingressClass:...setAsDefaultIngress: true... -
Install nginx-ingress using helm
Terminal window helm -n ingress install nginx-ingress -f values.yaml . --debug --create-namespace -
Check the installation
Terminal window kubectl -n ingress get all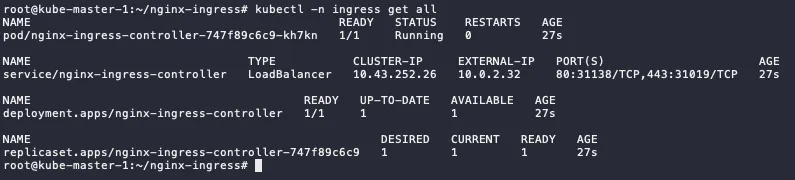
-
The
EXTERNAL-IPis available and reachable, but since no resources use it, it display 404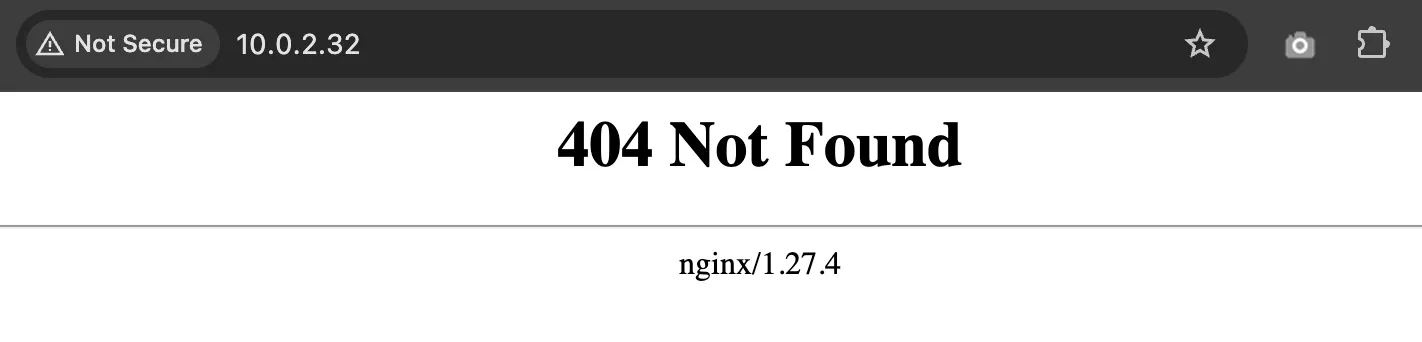
Testing the Ingress
Section titled “Testing the Ingress”-
Add bitname repository to helm
Terminal window helm repo add bitnami https://charts.bitnami.com/bitnami -
Check the repo list
Terminal window helm repo ls -
Search the nginx, we will use bitnami/nginx for the webserver nginx
Terminal window helm search repo nginx -
Pull the nginx from the repository, it will download tgz file.
Terminal window # run this in the home dir or other directoryhelm pull bitnami/nginx# extract the tgztar xvf nginx-* #make sure the nginx not nginx-ingress -
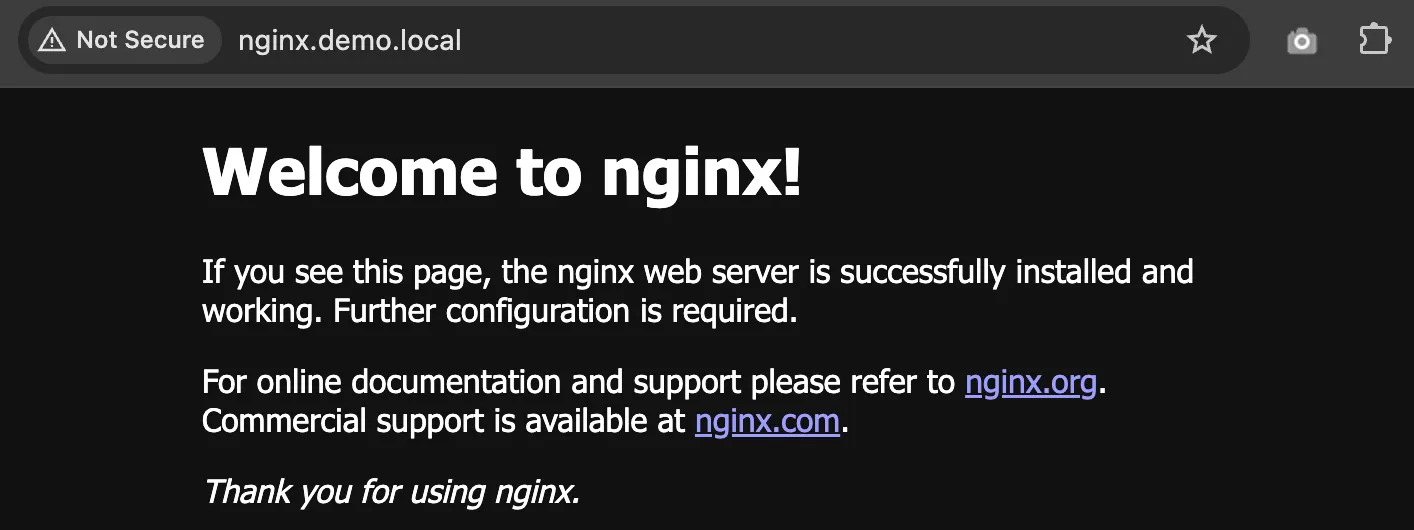
Change directory to metallb and edit
values.yamlfile.Terminal window cd nginx# editvim values.yaml#locate these variables...ingress:enabled: true...hostname: nginx.demo.local # make sure this FQDN is pointing to the ingress IP...ingressClassName: "nginx" # check using `kubectl get ingressclass`... -
Install metallb using helm
Terminal window helm -n demo install demo-app -f values.yaml . --debug --create-namespace -
Check the status, if the status still init, wait until running.
Terminal window kubectl -n demo get allkubectl -n demo get ingress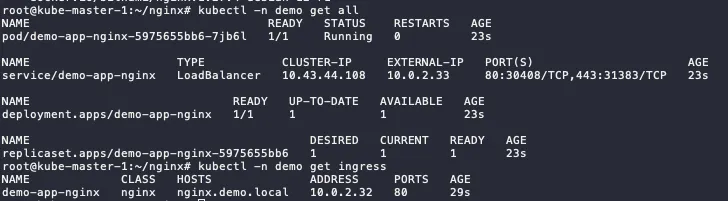
-
If you configure the FQDN in DNS or /etc/hosts correctly to ingress IP address, it will show like this
CEPH CSI - StorageClass Installation and Configuration
Section titled “CEPH CSI - StorageClass Installation and Configuration”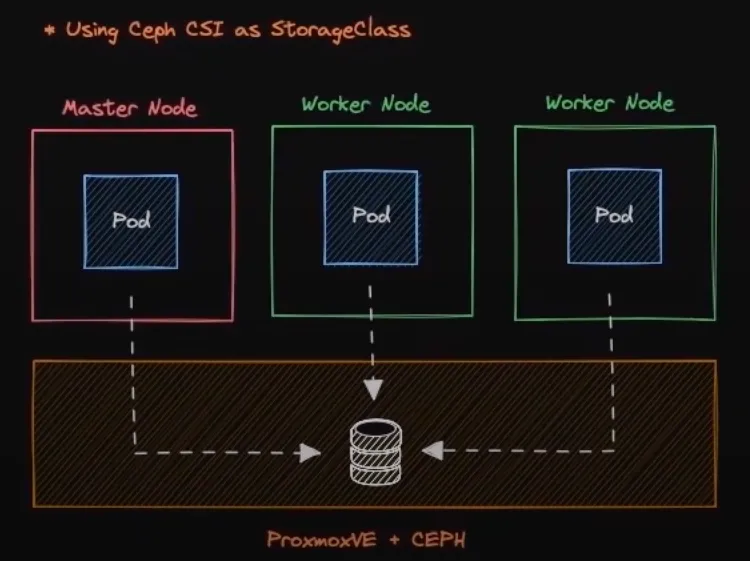
TODO - i don’t have CEPH cluster yet 🙈