Setting Up a Production-Ready VPS from Scratch: Rocky Linux 10 & Ubuntu 26.04
Setting Up a Production-Ready VPS from Scratch: Rocky Linux 10 & Ubuntu 26.04
Section titled “Setting Up a Production-Ready VPS from Scratch: Rocky Linux 10 & Ubuntu 26.04”Adapted from Dreams of Code, a dual-OS guide covering both RHEL-family and Debian-family setups.
Deploying to the cloud has never been easier. Platform-as-a-Service (PaaS) options like Railway, Fly.io, and Render make going live a breeze. But PaaS isn’t perfect for every use case: long-running tasks, heavy data transfer, and predictable billing often push teams toward a VPS (Virtual Private Server).
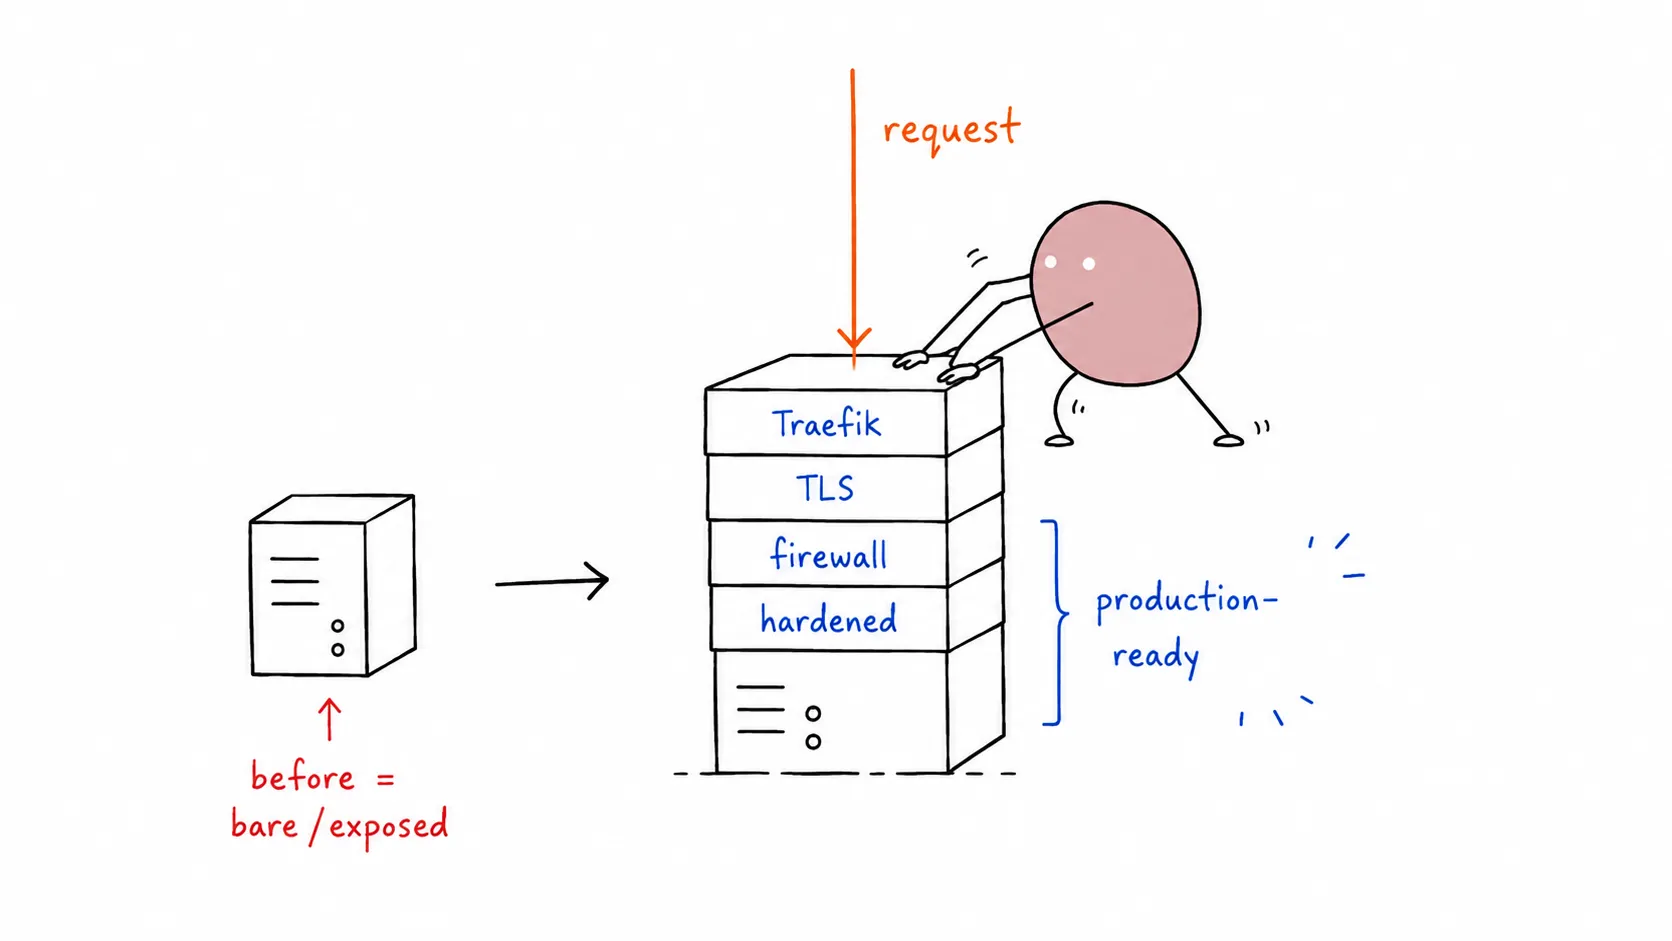
The perceived difficulty of hardening and configuring a raw VPS scares people off. But is it actually hard? We set out to prove it isn’t. Here’s a production-ready stack on both Rocky Linux 10 and Ubuntu 26.04 LTS.
What “Production-Ready” Means Here
Section titled “What “Production-Ready” Means Here”- DNS pointing to the server
- Application deployed and running (Docker)
- HTTPS/TLS with automatic cert provisioning & renewal (Let’s Encrypt)
- Hardened SSH: no root login, no password auth
- Firewall blocking unnecessary ports
- High availability: multiple app instances
- Load balancing via reverse proxy
- Automated rolling deployments
- Uptime monitoring with alerts
Constraints: No Kubernetes. No Coolify. No Terraform. Simple tooling, minimal domain expertise.
Step 1: Provisioning the VPS
Section titled “Step 1: Provisioning the VPS”Pick a provider (Hetzner, Hostinger, DigitalOcean, Vultr). We used a 2 vCPU / 8 GB RAM instance.
💡 Hosting with a side of nasi goreng? 🇮🇩 8labs offers VirtualLabs and ElasticLabs : VPS and scalable infrastructure, straight out of Indonesia. 🤙
During setup via your provider’s panel:
- Select Rocky Linux 10 or Ubuntu 26.04 LTS
- Set a strong root password
- Add your SSH public key
- Disable any “malware scanner” or monitoring agent if you don’t need it
Once deployed, test SSH:
ssh root@<your-server-ip>Step 2: Create a Non-Root User
Section titled “Step 2: Create a Non-Root User”Working as root is a bad habit. Create a regular user with sudo/wheel privileges.
# Create useruseradd -m -s /bin/bash deployerpasswd deployer
# Add to wheel group (Rocky's sudo equivalent)usermod -aG wheel deployer
# Testsu - deployersudo echo "sudo works"# Create user (interactive prompt)adduser deployer
# Add to sudo groupusermod -aG sudo deployer
# Testsu - deployersudo echo "sudo works"Tip: Install
tmuxon the VPS. If your SSH drops, reattach withtmux attach, no lost progress.Terminal window
Step 3: DNS Configuration
Section titled “Step 3: DNS Configuration”Point your domain to the VPS:
- Clear any existing A/AAAA/CNAME records at your registrar
- Add an A record for
@(root domain) pointing to your server’s IPv4 - Optionally add a
wwwCNAME pointing to@
Find your server IP:
ip -4 addr show | grep inet# orcurl -4 ifconfig.meDNS propagation takes minutes to hours. Move on to security while waiting.
Step 4: Harden SSH
Section titled “Step 4: Harden SSH”SSH is your front door. Lock it down.
4a. Generate and copy your SSH key
Section titled “4a. Generate and copy your SSH key”If you don’t already have an SSH key pair, generate one on your local machine:
# Press Enter to accept the default path (~/.ssh/id_ed25519)# Set a passphrase (recommended) or leave emptyEd25519 vs RSA: Ed25519 is faster, more compact, and just as secure as RSA 4096. It is supported by OpenSSH 6.5+ (released 2014), so it works on every modern server. Only use RSA 4096 if you need to connect to legacy servers running pre-2014 OpenSSH:
Terminal window
Then copy the public key to your server:
ssh-copy-id deployer@<server-ip>If you already have an SSH key, skip the generation step and jump straight to ssh-copy-id.
Test key-based login before proceeding:
ssh deployer@<server-ip>4b. Simplify with SSH config (optional)
Section titled “4b. Simplify with SSH config (optional)”Typing ssh [email protected] every time gets old. Add an entry to your local ~/.ssh/config:
Host prod-server    HostName 203.0.113.42    User deployer    IdentityFile ~/.ssh/id_ed25519
Host myapp.com    HostName myapp.com    User deployer    IdentityFile ~/.ssh/id_ed25519
Now you can connect with just:
ssh prod-serverssh myapp.comTip: Use short, memorable
Hostaliases. TheHostNamecan be either an IP address or a domain name. If you’re managing multiple servers, add an entry for each one — your fingers will thank you.
4c. Edit sshd_config
Section titled “4c. Edit sshd_config”sudo vim /etc/ssh/sshd_configSet or uncomment these lines:
PasswordAuthentication noPermitRootLogin noPubkeyAuthentication yes# Rocky: also check /etc/ssh/sshd_config.d/*.conf for overrides# Ubuntu: also check /etc/ssh/sshd_config.d/50-cloud-init.conf4d. Clean up cloud-init overrides
Section titled “4d. Clean up cloud-init overrides”Cloud images often ship a drop-in that re-enables password auth. Check and fix:
sudo grep -r "PasswordAuthentication" /etc/ssh/sshd_config.d/sudo vim /etc/ssh/sshd_config.d/50-cloud-init.conf# Comment out or delete any PasswordAuthentication yes line4e. Reload and Verify
Section titled “4e. Reload and Verify”sudo systemctl reload sshd
# This MUST fail:ssh root@<server-ip># Permission denied (publickey) ← good
# This MUST work:ssh deployer@<server-ip>⚠️ Do not close your current SSH session until you’ve verified a new session works. Open a second terminal for testing.
Step 5: Firewall
Section titled “Step 5: Firewall”Rocky uses firewalld by default (not ufw).
# Check statussudo systemctl status firewalld
# If not running, install and start:sudo dnf install -y firewalldsudo systemctl enable --now firewalld
# Default zonessudo firewall-cmd --get-default-zone   # usually 'public'
# Allow SSH (CRITICAL: do this first)sudo firewall-cmd --permanent --add-service=ssh
# Reload to applysudo firewall-cmd --reload
# Verifysudo firewall-cmd --list-all# Enable UFWsudo ufw default deny incomingsudo ufw default allow outgoing
# Allow SSH (CRITICAL: do this first)sudo ufw allow 22/tcp
# Enablesudo ufw enable
# Verifysudo ufw status verboseDocker bypass warning: Docker manipulates
iptablesdirectly, which can bypass bothfirewalldandufwrules for published ports. The solution: don’t publish container ports directly. Use a reverse proxy (Step 7) and only expose ports 80/443 on the host.
Step 6: Install Docker
Section titled “Step 6: Install Docker”# Remove old Docker packages if anysudo dnf remove -y docker docker-client docker-client-latest docker-common \ docker-latest docker-latest-logrotate docker-logrotate docker-engine
# Add Docker reposudo dnf config-manager --add-repo https://download.docker.com/linux/rhel/docker-ce.repo
# Install Dockersudo dnf install -y docker-ce docker-ce-cli containerd.io docker-buildx-plugin docker-compose-plugin
# Start and enablesudo systemctl enable --now docker
# Add user to docker groupsudo usermod -aG docker deployer
# Verifydocker --versiondocker compose versionIf dnf config-manager isn’t available:
sudo dnf install -y 'dnf-command(config-manager)'# Remove old packagesfor pkg in docker.io docker-doc docker-compose docker-compose-v2 \ podman-docker containerd runc; do sudo apt-get remove -y $pkg 2>/dev/nulldone
# Add Docker's GPG keysudo apt-get updatesudo apt-get install -y ca-certificates curlsudo install -m 0755 -d /etc/apt/keyringssudo curl -fsSL https://download.docker.com/linux/ubuntu/gpg \ -o /etc/apt/keyrings/docker.ascsudo chmod a+r /etc/apt/keyrings/docker.asc
# Add repoecho "deb [arch=$(dpkg --print-architecture) \ signed-by=/etc/apt/keyrings/docker.asc] \ https://download.docker.com/linux/ubuntu \ $(. /etc/os-release && echo "$VERSION_CODENAME") stable" | \ sudo tee /etc/apt/sources.list.d/docker.list > /dev/null
# Installsudo apt-get updatesudo apt-get install -y docker-ce docker-ce-cli containerd.io \ docker-buildx-plugin docker-compose-plugin
# Add user to docker groupsudo usermod -aG docker deployer
# Verifydocker --versiondocker compose versionLog out and back in (or newgrp docker) for the group change to take effect.
Step 7: Deploy the Application Stack
Section titled “Step 7: Deploy the Application Stack”We’ll use Docker Compose with a Go guestbook app + PostgreSQL, just like the original.
Create the project directory:
mkdir -p ~/guestbook/dbcd ~/guestbookCreate a secure Postgres password:
echo "your-strong-random-password-here" > db/postgres-password.txtchmod 600 db/postgres-password.txtInitial compose.yaml
Section titled “Initial compose.yaml”services: db: image: postgres:17 restart: always environment: POSTGRES_PASSWORD_FILE: /run/secrets/postgres-password volumes: - postgres-data:/var/lib/postgresql/data secrets: - postgres-password
guestbook: image: ghcr.io/yourusername/guestbook:prod restart: always environment: DATABASE_URL: postgres://postgres:${POSTGRES_PASSWORD}@db:5432/postgres?sslmode=disable ports: - "8080:8080" depends_on: - db
secrets: postgres-password: file: ./db/postgres-password.txt
volumes: postgres-data:Deploy:
export POSTGRES_PASSWORD=$(cat db/postgres-password.txt)docker compose up -dVerify:
docker compose pscurl http://localhost:8080Don’t expose port 8080 on the host permanently. We’ll remove it after setting up the reverse proxy.
Step 8: Reverse Proxy with Traefik
Section titled “Step 8: Reverse Proxy with Traefik”Traefik handles routing, TLS termination, and load balancing, all via Docker labels.
Update compose.yaml:
services:  reverse-proxy:    image: traefik:v3.3    command:      - "--providers.docker=true"      - "--providers.docker.exposedbydefault=false"      - "--entrypoints.web.address=:80"    ports:      - "80:80"    volumes:      - /var/run/docker.sock:/var/run/docker.sock:ro
  db:    # ... unchanged
  guestbook:    # ... unchanged except:    ports: []            # ← remove the host port mapping    labels:      - "traefik.enable=true"      - "traefik.http.routers.guestbook.rule=Host(`yourdomain.com`)"
# ... secrets and volumes unchanged
Open port 80 on the firewall:
sudo firewall-cmd --permanent --add-service=httpsudo firewall-cmd --reloadsudo ufw allow 80/tcpRedeploy:
docker compose up -dNow visit http://yourdomain.com. Traefik routes traffic to the guestbook container.
Step 9: Load Balancing: Run Multiple Instances
Section titled “Step 9: Load Balancing: Run Multiple Instances”Traefik automatically load-balances across containers with the same service name.
docker compose up -d --scale guestbook=3To make it permanent, add to compose.yaml:
services: guestbook: # ... deploy: replicas: 3Traefik round-robins by default. No extra config needed.
Step 10: HTTPS with Let’s Encrypt (Automatic TLS)
Section titled “Step 10: HTTPS with Let’s Encrypt (Automatic TLS)”Update Traefik service in compose.yaml:
services: reverse-proxy: image: traefik:v3.3 command: - "--providers.docker=true" - "--providers.docker.exposedbydefault=false" - "--entrypoints.web.address=:80" - "--entrypoints.websecure.address=:443" - "--certificatesresolvers.letsencrypt.acme.tlschallenge=true" - "--certificatesresolvers.letsencrypt.acme.storage=/letsencrypt/acme.json" ports: - "80:80" - "443:443" volumes: - /var/run/docker.sock:/var/run/docker.sock:ro - letsencrypt:/letsencryptUpdate guestbook labels:
services:  guestbook:    labels:      - "traefik.enable=true"      - "traefik.http.routers.guestbook.rule=Host(`yourdomain.com`)"      - "traefik.http.routers.guestbook.entrypoints=websecure"      - "traefik.http.routers.guestbook.tls.certresolver=letsencrypt"
      # HTTP → HTTPS redirect      - "traefik.http.routers.guestbook-http.rule=Host(`yourdomain.com`)"      - "traefik.http.routers.guestbook-http.entrypoints=web"      - "traefik.http.middlewares.redirect-to-https.redirectscheme.scheme=https"      - "traefik.http.routers.guestbook-http.middlewares=redirect-to-https"
Open port 443:
sudo firewall-cmd --permanent --add-service=httpssudo firewall-cmd --reloadsudo ufw allow 443/tcpRedeploy:
docker compose up -dTraefik automatically obtains and renews Let’s Encrypt certificates. The acme.json file stores them. Keep it safe (600 permissions, handled by Docker volume).
Step 11: Automated Deployments with Watchtower
Section titled “Step 11: Automated Deployments with Watchtower”Watchtower monitors Docker image registries and updates running containers when new images appear.
Add to compose.yaml:
services: watchtower: image: containrrr/watchtower command: - "--label-enable" # Only update containers with the label - "--interval" - "30" # Check every 30 seconds - "--rolling-restart" # One container at a time (for multi-replica) volumes: - /var/run/docker.sock:/var/run/docker.sock:roAdd the label to guestbook:
services: guestbook: labels: # ... existing Traefik labels - "com.centurylinklabs.watchtower.enable=true"Now when you push a new image to ghcr.io/yourusername/guestbook:prod, Watchtower picks it up within 30 seconds and performs a rolling restart, zero downtime.
Step 12: Monitoring
Section titled “Step 12: Monitoring”Free uptime monitoring options:
- Uptime Robot: 50 monitors, 5-minute checks, email alerts. Free tier.
- Better Uptime : 3-minute checks, heartbeat, status page. 10 monitors free.
- Uptime Kuma: Self-hosted. Run it in Docker on the same VPS or a separate tiny instance.
Set up a monitor for https://yourdomain.com and configure alerting (email, Telegram, Discord, Slack).
Final compose.yaml
Section titled “Final compose.yaml”The complete, production-ready stack:
services: reverse-proxy: image: traefik:v3.3 command: - "--providers.docker=true" - "--providers.docker.exposedbydefault=false" - "--entrypoints.web.address=:80" - "--entrypoints.websecure.address=:443" - "--certificatesresolvers.letsencrypt.acme.tlschallenge=true" - "--certificatesresolvers.letsencrypt.acme.storage=/letsencrypt/acme.json" ports: - "80:80" - "443:443" volumes: - /var/run/docker.sock:/var/run/docker.sock:ro - letsencrypt:/letsencrypt
db: image: postgres:17 restart: always environment: POSTGRES_PASSWORD_FILE: /run/secrets/postgres-password volumes: - postgres-data:/var/lib/postgresql/data secrets: - postgres-password
guestbook: image: ghcr.io/yourusername/guestbook:prod restart: always environment: DATABASE_URL: postgres://postgres:${POSTGRES_PASSWORD}@db:5432/postgres?sslmode=disable deploy: replicas: 3 labels: - "traefik.enable=true" - "traefik.http.routers.guestbook.rule=Host(`yourdomain.com`)" - "traefik.http.routers.guestbook.entrypoints=websecure" - "traefik.http.routers.guestbook.tls.certresolver=letsencrypt" - "traefik.http.routers.guestbook-http.rule=Host(`yourdomain.com`)" - "traefik.http.routers.guestbook-http.entrypoints=web" - "traefik.http.middlewares.redirect-to-https.redirectscheme.scheme=https" - "traefik.http.routers.guestbook-http.middlewares=redirect-to-https" - "com.centurylinklabs.watchtower.enable=true" depends_on: - db
watchtower: image: containrrr/watchtower command: - "--label-enable" - "--interval" - "30" - "--rolling-restart" volumes: - /var/run/docker.sock:/var/run/docker.sock:ro
secrets: postgres-password: file: ./db/postgres-password.txt
volumes: postgres-data: letsencrypt:Deploy:
export POSTGRES_PASSWORD=$(cat db/postgres-password.txt)docker compose up -dOS-Specific Quick Reference
Section titled “OS-Specific Quick Reference”| Task | Rocky Linux 10 | Ubuntu 26.04 |
|---|---|---|
| Package install | dnf install -y <pkg> | apt install -y <pkg> |
| Package search | dnf search <pkg> | apt search <pkg> |
| Add repo | dnf config-manager --add-repo <url> | add-apt-repository or manual .list |
| User create | useradd -m <user> | adduser <user> |
| Sudo group | wheel | sudo |
| Firewall | firewalld (firewall-cmd) | ufw |
| Service mgmt | systemctl | systemctl |
| SELinux | Enforcing by default (getenforce) | AppArmor by default |
| Logs | journalctl -u <unit> | journalctl -u <unit> |
| Cron | crond | cron |
| EPEL (extra pkgs) | dnf install -y epel-release | N/A |
Rocky SELinux Note
Section titled “Rocky SELinux Note”If SELinux blocks Docker operations (socket access, volume mounts):
Step 1: Find the blocked path. Run ausearch to see recent SELinux denials:
sudo ausearch -m avc -ts recentLook for the name= field in the output. Example denial and what to look for:
type=AVC msg=audit(1718123456.789:1234): avc: denied { write } forpid=5678 comm="dockerd" name="postgres-data" dev="sda1" ino=12345scontext=system_u:system_r:container_t:s0tcontext=system_u:object_r:default_t:s0 tclass=dirThe blocked path is in the name= field — here it’s postgres-data. You can also find the full path with:
sudo ausearch -m avc -ts recent | grep -oP 'name="?\K[^"\s]+'Step 2: Apply the fix. Set the SELinux context for the blocked path(s):
# Replace /path/to/mount with the actual path from ausearch outputsudo semanage fcontext -a -t container_file_t "/path/to/mount(/.*)?"sudo restorecon -Rv /path/to/mountFor Docker named volumes, the path is typically under /var/lib/docker/volumes/<volume-name>/. For bind mounts, use the host path from your docker-compose.yml volumes: section.
Usually Docker and SELinux coexist fine on Rocky 10 with default policies. Only intervene if you see Permission denied in container logs despite correct file permissions.
Checklist
Section titled “Checklist”- Non-root user created with sudo/wheel
- SSH:
PasswordAuthentication no,PermitRootLogin no - Firewall: only 22, 80, 443 open
- Docker installed, user in
dockergroup - App running as
docker compose up -d - Traefik reverse proxy routing traffic
- HTTPS active with Let’s Encrypt auto-renewal
- Multiple app replicas running
- Watchtower handling rolling updates
- Uptime monitor configured with alerts
Setting up a production-ready VPS is less intimidating than it looks. Traefik + Watchtower + Docker Compose gives you 90% of what a PaaS offers : with more control, predictable billing, and no vendor lock-in. Both Rocky Linux 10 and Ubuntu 26.04 make excellent foundations; pick the ecosystem you’re most comfortable with.